![howserweb[1]](https://blogger.googleusercontent.com/img/b/R29vZ2xl/AVvXsEgJ11gaddivqR8DTtNik-Jsup9o77yOhmlqdwh8CabqB-1ZqUgl61YhDXjWvceUCWI7KioSAu1mn5VWgIrdNuOluykjIdY5wNvLGtkKyu7Tvk9kCKABLsrG5MTXm_GOtctObrcbB2Xk9KM/?imgmax=800 "howserweb[1]")
I came across this artist the other day. He does an excellent job capturing the likeness of animals in pastel.
Check him out at Animal Pastel.


I came across this artist the other day. He does an excellent job capturing the likeness of animals in pastel.
Check him out at Animal Pastel.
Learning from my experience of writing the Die is Cast the next rules project is WW2. Currently under the working title of WW2 RD.

Again fairly scale independent its 1 figure equals one man/tank. Learning from TDIC its going to be slightly larger in size 7x10 inches which means that the font size can go up to 10 for easier reading.
Its IGo UGo but instead of that applying to the whole army, its a unit at a time. So players select a unit, perform all their actions with that unit and then the enemy get to do theirs.
Back in 2003 I set up a Yahoo group for this project and that where I will be loading the playtest rules and army lists. Its call the WW2RD group.
Is going to be held at the North West Gaming Centre, Manchester on Sunday the 20th October.
Because this the first event for the new version of the rules, I intend to take things easy and have only two games on the day.
It will be 1,500 point armies for 25mm, 15mm, 10mm and 6mm scale figures. With all participants having a chance to win the main prize, a copy of the board game Spartacus – Blood and Sand. I have played the board game and its a lot of fun.
The rules are available here and the army lists here. Just shout if there is an army list that you need to be published. The version of the rules that will be used is version 5.3 June 2013. The online (free) versions of the rules will be updated shortly to this version.
Further updates and the event details will be posted here as they are available.
Event info.
Venue, see above. Fee £5 per gamer, please PayPal me at: zedeyejoe@gmx.com or just pay me on the day.
Arrive: 9.00 – 10.00
First game: 10.00 – 12.30
Lunch: 12.30 – 13.30
Second game: 12.45 – 16.00
Results and roll off for the Spartacus game: 16.20 then we all go home
Food and drink is available to buy at the centre and is the only food and drink to be consumed at the centre. So if you bring your own please eat outside. Veggie choices are available.
Rules, as written. Orders will not be used (optional rule) but scouting will be.
All armies up to 1,500 points (yes that does mean 1,501 is over the limit). Army lists are available online (see above) shout if anything you want to use is not listed. Lets say 1100 AD is the time limit for armies, so no knights or gun powder weapons for which there are no rules anyway.
Army lists to me (zedeyejoe@gmx.com) in either plain text or Word format please on or by 5th October please. You can try other formats and I will let you know if they work or not. A list needs to show the number of units of each type used, the number of figures/elements used and the points values.
Players can use either 25/28mm, 15mm, 10mm or 6mm armies. Three streams will be run, the 25mm, 15mm and 6/10mm so that players can play against approximately the same sized figures.
25 (and 28)mm games. Use individually based figures. Notional base frontages; light troops 30mm, cavalry 25mm, infantry 20mm, elephants 60mm, 2 horse chariots 40mm, other chariots 60mm. If someone is using different sizes just match them up, so that an infantryman fights another infantryman regardless of actual base size. Likewise 2 light troops should match up against 3 infantry or an elephant.
15, 10 and 6mm games. Use element based figures. Each element a notional 40mm width. See section 22 of the rules to see how many figures each element is worth (its the number of wounds an element takes) and point accordingly. 80mm wide elements will be considered two elements, so double everything, the attacks, wounds and of course points cost! 60mm wide elements will be considered honorary 80mm wide elements (so as before, double everything). That should allow for most peoples basing systems. Remember, light troops work best in units of groups of 6 wounds (3 normal elements).
Terrain on tables will be pre-set, no need to bring your own. In the first game I will try to match historical opponents.
Dicing for the Spartacus Game
Every player will have dice and there will be a roll off to see who wins the game.
You get dice for;
2 dice, coming with a fully painted army
2 dice for using a Servile War army
1 die for each player (max 2) who thinks you are a sporting player
1 die for losing a game, 2 dice for a draw and 3 dice if you win.
Games are won or lost on the normal points system (19.9), a draw is where neither player scores more than 150 points more than the other. Games last until the time limit is reached or army break point (19.8), whichever is the sooner.
Any questions please ask.
Just added Ancient British, Early and Later Greek hoplite army lists.
http://uk.groups.yahoo.com/group/tdic2/files/TDIC%20army%20lists/
The Later Greek list is really quite interesting, with a wide variety of upgrades available and some fanatic Gallic mercenaries.
After the Society of Ancients battle day, I had the start of a Late Roman army which I have expanded with some artillery, skirmishers and some extra-heavy cavalry. So John Holroyd (my partner in developing TDIC v5) and I decided to have a game against his Sassanid Persians when we were meeting up to see the latest proof copy of TDIC – it is shortly going to get printed by Amazon.
Both armies 1250 points, in 6mm scale.
My Late Roman army,
Four units of legionaries, two units of auxila, two units of auxila archers (upgraded to elite status), two units of foot skirmishers (one with crossbow, one with bows), two units of skirmishing cavalry with bows (upgraded to Steady), two units of skirmishing cavalry with javelins, two units of heavy cavalry and a unit of extra-heavy cavalry. Most of my units were very small, as I hoped to use manoeuvre rather than force to beat Johns army.
Sassanid Persians
Three elephants, three units of peasant levy infantry, four units skirmishing cavalry (all with bows, some with javelins as well), three units of extra-heavy cavalry (with bow and lance) and a unit of cataphracts. Although his infantry was rubbish, Johns advantage was in his cavalry, more heavily armoured and better armoured than mine.
The Late Roman plan was to shoot down the enemy skirmishing cavalry, gain the advantage in mobility (basically the advantage to force the enemy either to move first or second) and then to hit with superiority at a given point.
Initial deployment of the armies, with my Romans at the bottom and the Sassanids at the top. You can see that the Roman line is considerably longer than the Sassanid. In my army the artillery have only been undercoated (they are white) and the same with Johns peasants.

Close up on some of the Romans. The general (a 2/2) on the right, with unit of auxila archers in front. Another unit of auxila in the foreground, with two units of heavy cavalry in front of them, the extra-heavy cavalry in front of them and a unit of horse archers in the distance.

The Sassanids. Horse archers to the front, elephants mixed in with the infantry, two units of extra-heavy cavalry in the distance.
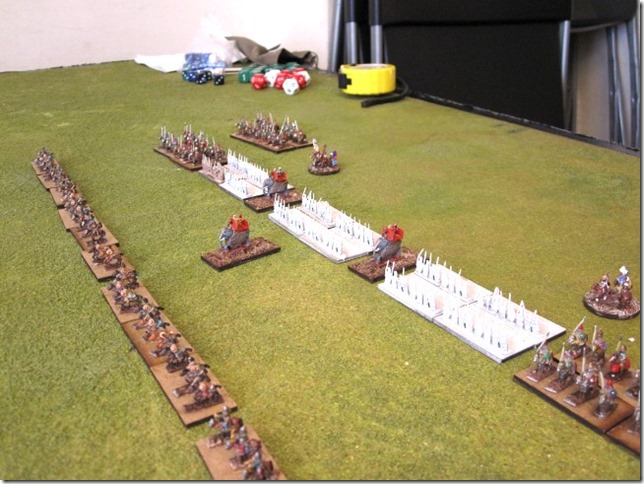
The starting move on the Roman right. Both sides cavalry advance and the skirmishers exchange shots, both sides lose a base of skirmishers.

Second move on the right. One of the Roman light cavalry units flees and the other moves onto the far right. The Sassanids advance with a reduced force of light cavalry with some extra-heavy cavalry and cataphracts coming up behind. A unit of Sassanid light cavalry is sent to deal with the Roman cavalry on the right.

And the final scene on the right. The Sassanids broke through, destroying the Roman light cavalry, a unit of auxila, a unit of legionaries and in this picture the Sassanid cataphracts about to break through and run down a unit of archers. So a total of five Roman units lost.
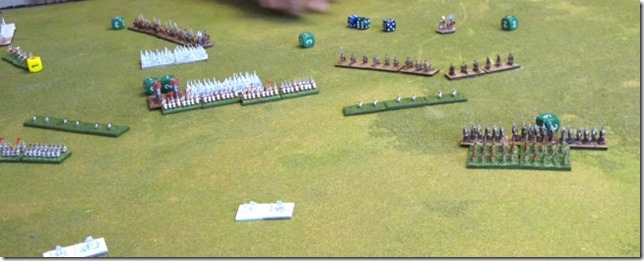
First move on the Roman left. A general advance but now the Roman light cavalry can force the Sassanid extra-heavies to move either first or second because of their greater speed.

End on the Roman left. With superior numbers, the Romans destroyed a unit of extra-heavy cavalry and the others wisely decided to move away. One elephant has been killed and the other two wounded – another was killed when the remaining elephants changed some legionaries. One unit of the levies has been destroyed and another forced to retreat. The Romans have taken some losses but only the odd casualty here and there.

The end view of the battlefield. In the centre another elephant dies and the levies are routed. So with the Romans winning on the left and centre, its a win for the Romans but at the cost of the entire Roman right flank.

It was noticeable how heavily armoured cavalry really cuts down the casualties from shooting. Most of the time shooting (on both sides) needed a lucky one to hit. So lots of dice being rolled but causing few hits. On the left the combat between the Sassanid and Roman extra-heavy cavalry was an even match, but throwing in the supporting Roman heavy cavalry swung the balance and resulted in a Roman victory. The Sassanid cavalry overwhelmed the Roman infantry (acting as little more than speed bumps) but since they were in the main very small units, few actual bases were lost. The game lasted about two hours. The rules printed by Amazon are a great improvement in both appearance and layout and people who have already bought a copy of the rules will be sent a new copy free of charge.
Learning some lessons from the previous weeks Late Roman civil war, we decided to go for a larger game. 1500 points per side ‘fantasy’ game of Indians vs Late Romans.
I dumped the rear rank of legionary archers that I had used in my last game and instead opted for pure units of legionaries.
So the army was like this
General 2/2
3 units of legionaries (one upgraded to elite)
2 units Roman heavy cavalry
1 unit of cataphracts
3 units of horse archers (all upgraded to steady)
1 unit of javelin armed light cavalry
2 units of auxlia
against, well I am not really sure but it looks like a lot of Indians. Somewhere in that lot were 8 elephants, 5 heavy chariots and 3 light chariots.
My opponent (Dave) is moving his army

Following the course of the battle from Roman left to right. See below.
At the end of the second turn on the Roman left, I am forcing the Indians back. I have charged with all three units of Roman cavalry (one light, one heavy and a cataphract unit) to which Dave has countered by evading all three of his units (on the black table board), avoiding contact. Dave has opened fire with three of his units A the heavy chariots, B the evading light chariots and C a unit of foot archers, causing 3 hits on the cataphracts. Just short of the 4 hits needed to remove a base of cataphracts, so I need to get them into combat before they get whittled down.

Situation after movement on turn three, I have charged again, again failing to catch anything with the heavy cavalry or cataphracts but the light cavalry (on the left of the picture) catch a unit of Indian cavalry, fight them and break them – under TIDC catching an evading enemy is not an automatic break, the evaders get a chance to fight back but being hit in the rear it is unlikely that they will win. The Indian heavy chariots are moving forward to confront the cataphracts.

At the end of movement of turn four, the Indian heavy chariots have been charged by both the cataphracts and the Roman heavy cavalry. The Indian chariots had declared a charge against the Roman cataphracts but that had been cancelled by the charge of the Roman cavalry against them, the heavy chariots cannot evade (not an option for them) and cannot counter-charge because the heavy cavalry is within half their charge move, so the heavy chariots have to hold and take the charge at the halt. The Indian cavalry and light chariots, no longer charged themselves, turn round and face their enemy. On the right of the picture you can see the elephants which unform both the cataphracts and the Indian light chariots (too close, despite the Indians being used to elephants), and some Indian archers shooting at the charging cataphracts.

The Indian heavy chariots were heavily defeated (7-1) and broke. The cataphracts pursued into the light chariots, the Roman heavy cavalry pursued into the Indian medium cavalry. But the elephants also charged the flank of the cataphracts and a unit of Roman horse archers charged into the flank of the Indian archers. We ran out of time at this point but the cataphracts would have certainly been beaten, the cavalry/cavalry combat would probably been a victory to the Romans and the light cavalry attack might or might not have been successful.

In the centre, things did not go the Roman way. On turn three, I had charged into a unit of Indian skirmishers with a unit of auxila but thrown awful morale dice and routed rather than charged. The Indian elephants charged a unit of horse archers who wisely evaded the elephants. But all that did leave my legionaries (led by the Roman general) sitting out there with their flanks exposed.

The situation in the centre just continues to get worse for the Romans

Situation in the centre at the end of the game. Attacked frontally and then in the flank the Roman legionaries are chopped to pieces. The Roman auxila (bottom right) have again failed to roll good dice and have become Shaken and refuse to support their general, the survivors would almost certainly be slaughtered and the general killed. Motto, keep that combat line intact and don’t expose your flanks to the enemy. Big mistake on my part.

On the Roman right a unit of Roman legionaries come under threat by four elephants and wisely form shieldwall the resist the charge. Meanwhile a unit of elite legionaries take up position behind them, either to reinforce the melee next turn if the other legionaries hold the elephants or to hold the elephants if they break through.

Well it was a break-though by the elephants, wiping out the front unit of legionaries. But the elite legion and the auxila held, fighting in the next round (and last round of the game) inflicting another 7 hits and with the 5 hits that the elephants had suffered, three elephants would be dead, in effect removing that threat. But the loss to the legionaries was grievous, 2 entire bases of legionaries killed (8 hits) and 3 hits (thats what the yellow dice represent) on the auxila. So a combat result of 11-7, a loss to the Romans but not a major one.
On the Roman right, a unit of heavy cavalry and a unit of horse archers gradually fall back in front of the advancing Indians.

But something has to be done to stop the Indian heavy chariots from getting onto the flank of the Roman infantry. So the heavy cavalry charge the heavy chariots (who are also charging them). The combat was almost complete destruction of the Roman cavalry but one chariot was destroyed and that automatically made the Indian unit shaken, with no possibility to further advance against the enemy.

So with the Roman right gone, the centre and general killed and the cataphracts wiped out, this was a major victory for the Indians.
The Romans had the advantage of mobility with their light cavalry but I failed to make the most use of it. The cataphracts are stunningly formidable but need light cavalry in support, both to screen them from missile fire but also to catch any enemy trying to get away from their advance. And as for the legionaries, the motto should be maintain the line and don’t let the enemy get at your flanks!
After the Chalons battleday I thought I would have enough figures to do a Late Roman army, more fool me. When I worked it out I needed infantry, lots more infantry and some troops types like cataphracts which were not in the Chalons order of battle. So after a couple of days painting I had enough for a real army, just as I was challenged to a game by Simon Peyton, who also planned to use a Late Roman army, so the scene was set for civil war.
My army (1,000 points using figures based for Warmaster Ancients) was as follows;
General 2/2
Roman heavy cavalry unit of 4 bases
Roman light cavalry unit 3 bases
3 units of legionaries, each 3 bases of medium infantry with 3 bases of archers in rear ranks
A unit of auxila 3 bases
Two units of horse archers, 3 bases each
A unit of cataphract cavalry, 4 bases.
Simons army was very similar but he had only two units of legionaries, all legionaries (no archers), his cataphracts were only 3 bases strong and he had upgraded his heavy cavalry to steady.
We played at Worthy Games in Preston, with some of our own terrain added to the gaming table (see below).
This is the situation at the end of movement of turn 2. My own three units of legionaries are circled in blue, also I have used a unit of light cavalry (using forced movement) to box in Simons legionaries and cataphracts (circled red). At the top of the picture, the majority of my cavalry is facing off against Simons horse archers. At the bottom left, a unit of my horse archers are trying to sneak round the marsh and the wood, to get behind the enemy.

At the end of movement on the third turn. In the centre, Simons cataphracts charged my horse archers who evaded the charge and left the cataphracts facing my auxila (now occupying the hill). On both both flanks (see blue arrows) Simons light cavalry was routed by being charged and his units failing their morale checks. Also on the right of the picture, both units of Roman heavy cavalry charge. Simons cavalry is outnumbered 3 to 4, due to some shooting losses he took earlier.

A close-up of the situation in the centre. Simons legions (on the left) have expanded into battle formation three bases deep and his auxila are advancing behind his cavalry.

At the end of combat on turn four. Simons cavalry has been destroyed by the reinforcement of the cavalry melee on the right by my cataphracts (blue X marks the spot). That means that the flank of his auxila will be vulnerable to a charge by my cataphracts next turn. In the centre his cataphracts won the melee against my auxila but not sufficiently to break them. That means that the combat will continue but one of my legionary units will be able to charge onto the flank of his cataphracts in the next turn. Both of my light cavalry units have got behind his army (blue arrows at the top of the picture).

The end of the battle, at the end of turn 6. Simons cataphracts and auxila have been broken (both were charged in the flank after all) see red arrows on the left of the picture. Simons three remaining intact units are circled in red. A unit of light infantry in the wood and two units of legionaries in combat, currently holding their own but surrounded and likely to be beaten in combat. My three units of legionaries are circled in blue. My only serious loss was my heavy cavalry, reduced to half strength (white shields at top of picture) and so automatically Shaken and unable to continue the attack. The yellow dice are used to mark partial casualties on units, where the casualties have not been sufficient to remove a full base (light troop bases take 2 hits each, cavalry 3 and cataphracts/infantry 4 hits).

Simon conceded the game but not bad play for his first attempt.

