Popular Posts

Showing posts with label Battle report. Show all posts

Thursday, 27 June 2013

The Die is Cast Sassanid Persians vs Late Romans

After the Society of Ancients battle day, I had the start of a Late Roman army which I have expanded with some artillery, skirmishers and some extra-heavy cavalry. So John Holroyd (my partner in developing TDIC v5) and I decided to have a game against his Sassanid Persians when we were meeting up to see the latest proof copy of TDIC – it is shortly going to get printed by Amazon.

Both armies 1250 points, in 6mm scale.

My Late Roman army,

Four units of legionaries, two units of auxila, two units of auxila archers (upgraded to elite status), two units of foot skirmishers (one with crossbow, one with bows), two units of skirmishing cavalry with bows (upgraded to Steady), two units of skirmishing cavalry with javelins, two units of heavy cavalry and a unit of extra-heavy cavalry. Most of my units were very small, as I hoped to use manoeuvre rather than force to beat Johns army.

Sassanid Persians

Three elephants, three units of peasant levy infantry, four units skirmishing cavalry (all with bows, some with javelins as well), three units of extra-heavy cavalry (with bow and lance) and a unit of cataphracts. Although his infantry was rubbish, Johns advantage was in his cavalry, more heavily armoured and better armoured than mine.

The Late Roman plan was to shoot down the enemy skirmishing cavalry, gain the advantage in mobility (basically the advantage to force the enemy either to move first or second) and then to hit with superiority at a given point.

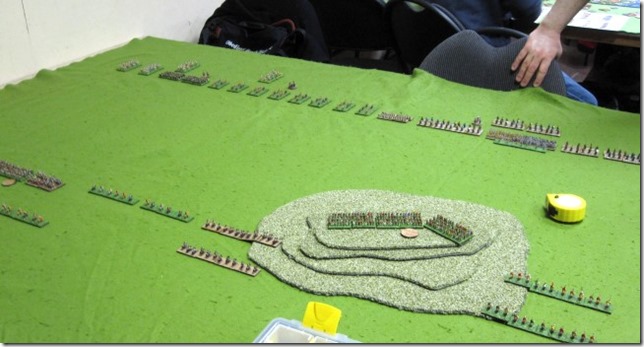
Initial deployment of the armies, with my Romans at the bottom and the Sassanids at the top. You can see that the Roman line is considerably longer than the Sassanid. In my army the artillery have only been undercoated (they are white) and the same with Johns peasants.

tdic062613_01_s

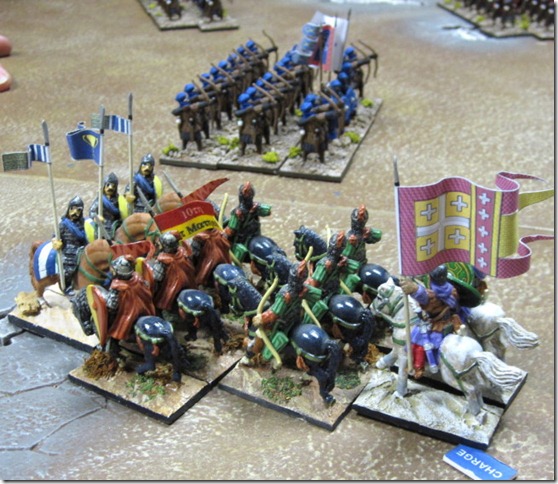
Close up on some of the Romans. The general (a 2/2) on the right, with unit of auxila archers in front. Another unit of auxila in the foreground, with two units of heavy cavalry in front of them, the extra-heavy cavalry in front of them and a unit of horse archers in the distance.

tdic062613_03_s

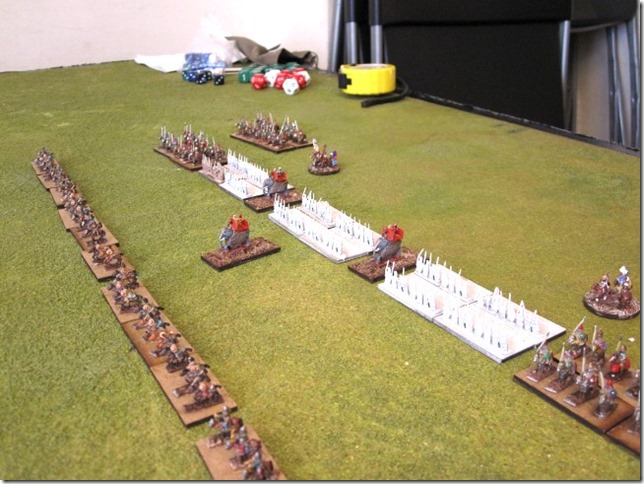
The Sassanids. Horse archers to the front, elephants mixed in with the infantry, two units of extra-heavy cavalry in the distance.
tdic062613_02_s

The starting move on the Roman right. Both sides cavalry advance and the skirmishers exchange shots, both sides lose a base of skirmishers.

tdic062613_04_s

Second move on the right. One of the Roman light cavalry units flees and the other moves onto the far right. The Sassanids advance with a reduced force of light cavalry with some extra-heavy cavalry and cataphracts coming up behind. A unit of Sassanid light cavalry is sent to deal with the Roman cavalry on the right.

tdic062613_07_s

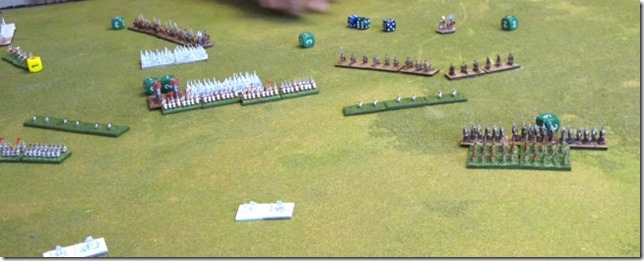
And the final scene on the right. The Sassanids broke through, destroying the Roman light cavalry, a unit of auxila, a unit of legionaries and in this picture the Sassanid cataphracts about to break through and run down a unit of archers. So a total of five Roman units lost.
tdic062613_10_s

First move on the Roman left. A general advance but now the Roman light cavalry can force the Sassanid extra-heavies to move either first or second because of their greater speed.

tdic062613_05_s

End on the Roman left. With superior numbers, the Romans destroyed a unit of extra-heavy cavalry and the others wisely decided to move away. One elephant has been killed and the other two wounded – another was killed when the remaining elephants changed some legionaries. One unit of the levies has been destroyed and another forced to retreat. The Romans have taken some losses but only the odd casualty here and there.

tdic062613_09_s

The end view of the battlefield. In the centre another elephant dies and the levies are routed. So with the Romans winning on the left and centre, its a win for the Romans but at the cost of the entire Roman right flank.

tdic062613_11_s

It was noticeable how heavily armoured cavalry really cuts down the casualties from shooting. Most of the time shooting (on both sides) needed a lucky one to hit. So lots of dice being rolled but causing few hits. On the left the combat between the Sassanid and Roman extra-heavy cavalry was an even match, but throwing in the supporting Roman heavy cavalry swung the balance and resulted in a Roman victory. The Sassanid cavalry overwhelmed the Roman infantry (acting as little more than speed bumps) but since they were in the main very small units, few actual bases were lost. The game lasted about two hours. The rules printed by Amazon are a great improvement in both appearance and layout and people who have already bought a copy of the rules will be sent a new copy free of charge.

Sunday, 19 May 2013

TDIC – Late Romans vs classical Indians

Learning some lessons from the previous weeks Late Roman civil war, we decided to go for a larger game. 1500 points per side ‘fantasy’ game of Indians vs Late Romans.

I dumped the rear rank of legionary archers that I had used in my last game and instead opted for pure units of legionaries.

So the army was like this

General 2/2
3 units of legionaries (one upgraded to elite)
2 units Roman heavy cavalry
1 unit of cataphracts
3 units of horse archers (all upgraded to steady)
1 unit of javelin armed light cavalry
2 units of auxlia

against, well I am not really sure but it looks like a lot of Indians. Somewhere in that lot were 8 elephants, 5 heavy chariots and 3 light chariots.

My opponent (Dave) is moving his army

tdic051613_01_s

Following the course of the battle from Roman left to right. See below.

At the end of the second turn on the Roman left, I am forcing the Indians back. I have charged with all three units of Roman cavalry (one light, one heavy and a cataphract unit) to which Dave has countered by evading all three of his units (on the black table board), avoiding contact. Dave has opened fire with three of his units A the heavy chariots, B the evading light chariots and C a unit of foot archers, causing 3 hits on the cataphracts. Just short of the 4 hits needed to remove a base of cataphracts, so I need to get them into combat before they get whittled down.

tdic051613_02_s

Situation after movement on turn three, I have charged again, again failing to catch anything with the heavy cavalry or cataphracts but the light cavalry (on the left of the picture) catch a unit of Indian cavalry, fight them and break them – under TIDC catching an evading enemy is not an automatic break, the evaders get a chance to fight back but being hit in the rear it is unlikely that they will win. The Indian heavy chariots are moving forward to confront the cataphracts.

tdic051613_08_s

At the end of movement of turn four, the Indian heavy chariots have been charged by both the cataphracts and the Roman heavy cavalry. The Indian chariots had declared a charge against the Roman cataphracts but that had been cancelled by the charge of the Roman cavalry against them, the heavy chariots cannot evade (not an option for them) and cannot counter-charge because the heavy cavalry is within half their charge move, so the heavy chariots have to hold and take the charge at the halt. The Indian cavalry and light chariots, no longer charged themselves, turn round and face their enemy. On the right of the picture you can see the elephants which unform both the cataphracts and the Indian light chariots (too close, despite the Indians being used to elephants), and some Indian archers shooting at the charging cataphracts.

tdic051613_09_s

The Indian heavy chariots were heavily defeated (7-1) and broke. The cataphracts pursued into the light chariots, the Roman heavy cavalry pursued into the Indian medium cavalry. But the elephants also charged the flank of the cataphracts and a unit of Roman horse archers charged into the flank of the Indian archers. We ran out of time at this point but the cataphracts would have certainly been beaten, the cavalry/cavalry combat would probably been a victory to the Romans and the light cavalry attack might or might not have been successful.

tdic051613_10_s

In the centre, things did not go the Roman way. On turn three, I had charged into a unit of Indian skirmishers with a unit of auxila but thrown awful morale dice and routed rather than charged. The Indian elephants charged a unit of horse archers who wisely evaded the elephants. But all that did leave my legionaries (led by the Roman general) sitting out there with their flanks exposed.

tdic051613_03_s

The situation in the centre just continues to get worse for the Romans

tdic051613_07_s

Situation in the centre at the end of the game. Attacked frontally and then in the flank the Roman legionaries are chopped to pieces. The Roman auxila (bottom right) have again failed to roll good dice and have become Shaken and refuse to support their general, the survivors would almost certainly be slaughtered and the general killed. Motto, keep that combat line intact and don’t expose your flanks to the enemy. Big mistake on my part.

tdic051613_11_s

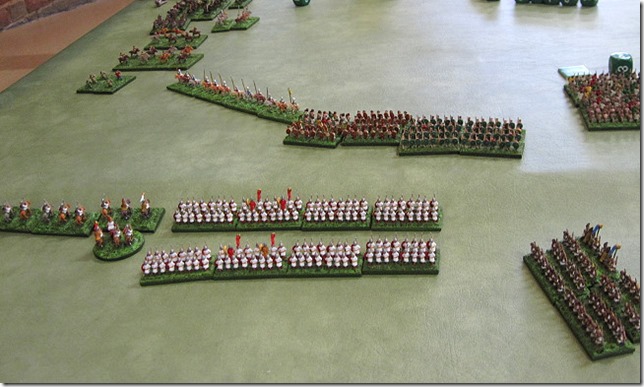
On the Roman right a unit of Roman legionaries come under threat by four elephants and wisely form shieldwall the resist the charge. Meanwhile a unit of elite legionaries take up position behind them, either to reinforce the melee next turn if the other legionaries hold the elephants or to hold the elephants if they break through.
tdic051613_06_s

Well it was a break-though by the elephants, wiping out the front unit of legionaries. But the elite legion and the auxila held, fighting in the next round (and last round of the game) inflicting another 7 hits and with the 5 hits that the elephants had suffered, three elephants would be dead, in effect removing that threat. But the loss to the legionaries was grievous, 2 entire bases of legionaries killed (8 hits) and 3 hits (thats what the yellow dice represent) on the auxila. So a combat result of 11-7, a loss to the Romans but not a major one.

On the Roman right, a unit of heavy cavalry and a unit of horse archers gradually fall back in front of the advancing Indians.

tdic051613_12_s

But something has to be done to stop the Indian heavy chariots from getting onto the flank of the Roman infantry. So the heavy cavalry charge the heavy chariots (who are also charging them). The combat was almost complete destruction of the Roman cavalry but one chariot was destroyed and that automatically made the Indian unit shaken, with no possibility to further advance against the enemy.

tdic051613_14_s

So with the Roman right gone, the centre and general killed and the cataphracts wiped out, this was a major victory for the Indians.

The Romans had the advantage of mobility with their light cavalry but I failed to make the most use of it. The cataphracts are stunningly formidable but need light cavalry in support, both to screen them from missile fire but also to catch any enemy trying to get away from their advance. And as for the legionaries, the motto should be maintain the line and don’t let the enemy get at your flanks!

Friday, 10 May 2013

TDIC a very Roman civil war

After the Chalons battleday I thought I would have enough figures to do a Late Roman army, more fool me. When I worked it out I needed infantry, lots more infantry and some troops types like cataphracts which were not in the Chalons order of battle. So after a couple of days painting I had enough for a real army, just as I was challenged to a game by Simon Peyton, who also planned to use a Late Roman army, so the scene was set for civil war.

My army (1,000 points using figures based for Warmaster Ancients) was as follows;

General 2/2
Roman heavy cavalry unit of 4 bases
Roman light cavalry unit 3 bases
3 units of legionaries, each 3 bases of medium infantry with 3 bases of archers in rear ranks
A unit of auxila 3 bases
Two units of horse archers, 3 bases each
A unit of cataphract cavalry, 4 bases.

Simons army was very similar but he had only two units of legionaries, all legionaries (no archers), his cataphracts were only 3 bases strong and he had upgraded his heavy cavalry to steady.

We played at Worthy Games in Preston, with some of our own terrain added to the gaming table (see below).

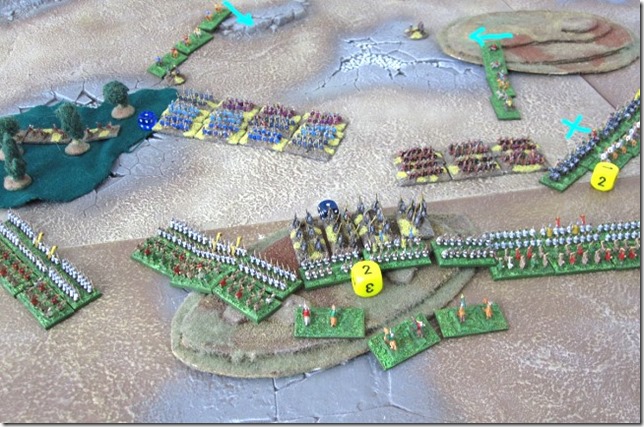
This is the situation at the end of movement of turn 2. My own three units of legionaries are circled in blue, also I have used a unit of light cavalry (using forced movement) to box in Simons legionaries and cataphracts (circled red). At the top of the picture, the majority of my cavalry is facing off against Simons horse archers. At the bottom left, a unit of my horse archers are trying to sneak round the marsh and the wood, to get behind the enemy.

tdic051013_01_s


At the end of movement on the third turn. In the centre, Simons cataphracts charged my horse archers who evaded the charge and left the cataphracts facing my auxila (now occupying the hill). On both both flanks (see blue arrows) Simons light cavalry was routed by being charged and his units failing their morale checks. Also on the right of the picture, both units of Roman heavy cavalry charge. Simons cavalry is outnumbered 3 to 4, due to some shooting losses he took earlier.
tdic051013_02_s

A close-up of the situation in the centre. Simons legions (on the left) have expanded into battle formation three bases deep and his auxila are advancing behind his cavalry.

tdic051013_03_s

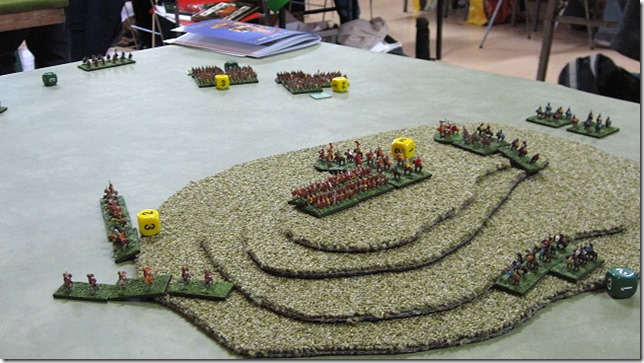
At the end of combat on turn four. Simons cavalry has been destroyed by the reinforcement of the cavalry melee on the right by my cataphracts (blue X marks the spot). That means that the flank of his auxila will be vulnerable to a charge by my cataphracts next turn. In the centre his cataphracts won the melee against my auxila but not sufficiently to break them. That means that the combat will continue but one of my legionary units will be able to charge onto the flank of his cataphracts in the next turn. Both of my light cavalry units have got behind his army (blue arrows at the top of the picture).

tdic051013_04_s

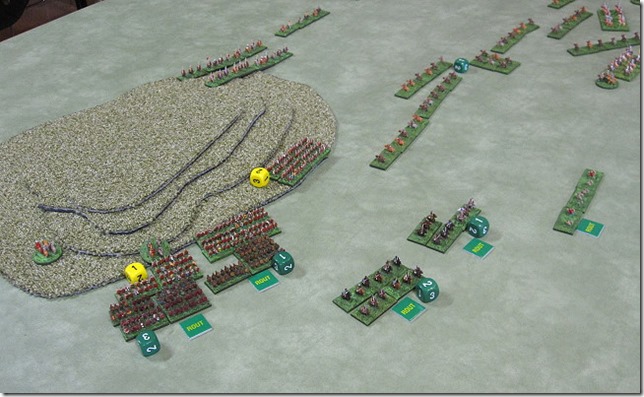
The end of the battle, at the end of turn 6. Simons cataphracts and auxila have been broken (both were charged in the flank after all) see red arrows on the left of the picture. Simons three remaining intact units are circled in red. A unit of light infantry in the wood and two units of legionaries in combat, currently holding their own but surrounded and likely to be beaten in combat. My three units of legionaries are circled in blue. My only serious loss was my heavy cavalry, reduced to half strength (white shields at top of picture) and so automatically Shaken and unable to continue the attack. The yellow dice are used to mark partial casualties on units, where the casualties have not been sufficient to remove a full base (light troop bases take 2 hits each, cavalry 3 and cataphracts/infantry 4 hits).

tdic051013_05_s

Simon conceded the game but not bad play for his first attempt.

Sunday, 14 April 2013

Chalons – the final battle

Well after weeks of preparation, both armies were fully painted and we headed off to the Society of Ancients battle day at Sycamore Hall, Bletchley.

There were 15 games in progress, all fighting the same battle but using different rules. The only other game using 6mm figures was the battle being played under Warmaster Ancients and they had twice as many figures as we had.

It was all very tight and we had no real space to display all the bumf that I had prepared to go with the game, but there were some railings behind the game that I managed to stick stuff on to. So it looked like this

soa_chalons01_s 

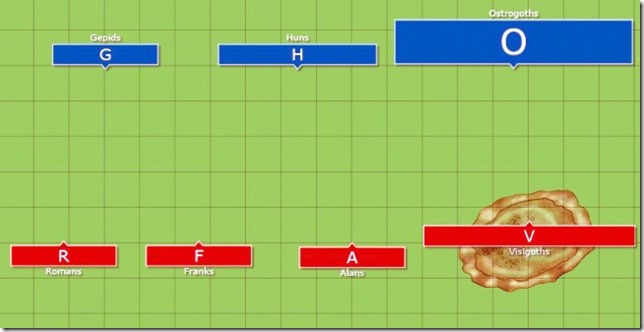
A map of the deployment. Details of the scenario, here.

Chalons_Deployment

Now this is a picture of the first turn, a mass of Ostrogoths approaching the hill. As has been proven from previous try-outs of the battle, the best strategy is for the Ostrogoths to try and force a passage through on the right flank of the hill. This time the Ostrogoth player massed four units (of the six that he had available) of cavalry and was opposed by two units of Visigoth cavalry.

soa_chalons04_s

Contact is made, two units of Ostrogoths against one unit of Visigoths

soa_chalons05_s

Now a feature of the Die is Cast rules are that in subsequent rounds of melee, additional ranks of cavalry can join the fight, so both sides now throw in another cavalry unit each into the combat on the right of the hill.

soa_chalons06_s

The result cripples the Visigoths, although both sides lose 2 bases of cavalry in the combat, the Ostrogoths outnumber their enemies by 2:1 and so can afford to exchange losses knowing that at this rate, some of them will be left alive when all the Visigoth cavalry are dead.

soa_chalons07_s

In the next round of combat, the Ostrogoths add another unit of cavalry to the fight but still mange to lose the combat and one of their units of cavalry is forced to retreat. That still leaves three units of Ostrogoth cavalry fighting two rather beaten up units of Visigoth cavalry.

soa_chalons08_s

But the serious combat begins on the hill. It is vital for the Visigoth infantry to beat the Ostrogoth infantry before the enemy cavalry (which looks increasingly certain to win on the flank) is able to turn onto the flanks of the Visigoths and beat them. The Ostrogoths reinforced their attack with a unit of cavalry, forcing the Visigoths to stand and take the charge but cavalry attacking uphill is still not effective.

soa_chalons09_s

Although the Ostrogoths won that round of combat, it was not enough to upset the Visigoths, who were being led by their King Theoderic.

Then in the next round, the Ostrogoths throw another unit of cavalry up the hill into fresh Visigoth infantry, lose the combat and are broken. Like a wave, the fear spreads thoughout the Ostrogoths and both units of their cavalry and all their infantry flee down the hill. However on the right of the hill the Visigoth cavalry has been destroyed, leaving the flanks of the victorious infantry wide open. On the plus side, two of the Ostrogothic cavalry units are so damaged that they are blown and cannot advance further, another of their units of cavalry has headed off in wild pursuit of the routing Visigoths and the remaining Ostrogoth cavalry unit is being persuaded to stop their retreat and head back to the fight.

soa_chalons11_s

But the Huns have advanced through the centre of the Roman forces, swept the Alans aside without even having to fight them. Now they have swung round to attack the flank of the previously immobile Romans (with great success) and attack the pursuing Visigoths.

soa_chalons12_s

Whilst two of the Visigothic infantry units continue the pursuit of the fleeing Ostrogothic infantry – deaf to their commanders orders to halt the pursuit. The hill is now attacked from three sides and the remaining Visigoths crumble under the assault.

soa_chalons15_s

The Roman sub-commander, having led the centre is pursued and overrun with his remaining unit of cavalry, dying in sight of Aetuis now leading his legions against the Hunnic right wing.

soa_chalons16_s

soa_chalons13_s

But Aetius was unsuccessful, Gepid lancers destroyed the elite Roman cavalry and the Frank/German infantry fought the legions to a draw.

So with the hill taken by the Huns, the Roman centre smashed and the Roman left unable to make a difference, we declared the game a stunning victory to the Huns.

Why did it happen? Well the victory of the Ostrogoth cavalry on the right of the hill was the start of it. The Roman forces just cannot afford to fight a game of attrition. The Romans really need to win on the right and then be able to successfully attack the Huns in the centre and the Roman left can support them in that. But the Romans cannot win the day on their own.

In points terms the Huns have a slight advantage in points, 1800 against the Roman 1700. It might be interesting to add another 100 points of troops to the Roman side and see how an equal points battle will go.

Tuesday, 9 April 2013

Chalons a triumph, then disaster

On Good Friday we took our Chalons game down to the Wigan wargames club to try out. What happened was one of the oddest games I have yet played.


We take the battle from the point where the Visigoths have occupied the hill and the Ostrogoths have been told to take it.
So the armies of both sides are static except for the Ostrogoths on the Hunnic side. As soon as they contact the Visigoth infantry on the hill, the entire Hunnic army is released and can start moving. But if the Visigoths rout an Ostrogoth unit in combat, the entire Roman army gets released.

chalons032913_11_s


In effect this gives the Ostrogoths three choices;
1) Suicide a unit up the hill but not much of an advantage as both armies will be released.
2) Straight forward attack, straight up the hill but this tends not to work.
3) Attack round the flanks of the hill and then attack the Visigoth infantry in the flank, the most successful option.


So our experienced Ostrogothic commander attempts option 3 but is totally repulsed, the attacking Ostrogoth cavalry are broken (releasing the entire Roman force) with the Visigoth cavalry in hot pursuit.


There then followed a couple of turns of the Attila urging his compatriot to attack the hill quickly and not bother about the fancy tactics, as he was now faced with advancing Romans and little chance of stopping them if he could not move his own forces.
So the infantry attached to the Ostrogoths were sent up the hill in a rather doomed frontal attack and so it proved. At this point we were looking at an overwhelming Roman victory, the first time this had happened.


But since contact on the hill had been made, the Hunnic army was also released, some forces moving to help the Goths and the others attacking the centre.


After a couple of turns of fighting the pursuing Visigoths were stopped and indeed thrown back in disarray. With their cavalry gone the victorious Visigoths infantry flanks and rear was exposed and soon the Ostrogoth cavalry swarmed round them and started to destroy the enemy infantry.

chalons032913_15_s


In the centre the Alans fled before even making contact and a unit of Hun Noble cavalry broke through a unit of Roman allied Frank infantry, broke them, rallied immediately and then charged into the flank of some Frank cavalry which had been fighting against other Hun cavalry, breaking them immediately.

chalons032913_16_s


Only one part of the Roman army remained intact, the Roman left wing under Aetius, who were fighting rather indecisively against the Gepids. With centre gone, it was obvious that they too would be surrounded and cut to pieces.
Perhaps it was a rather impetuous Roman pursuit that was our undoing but it had all looked to be going so well, so could the Roman players be blamed for trying to take advantage of the situation.


Anyway Saturday is another day, perhaps the dice will bring a Roman victory this time.

Monday, 25 February 2013

Warmaster Ancients – the day of battle

As mentioned previously the all day WMA event took place in Preston, last Saturday.

On the day there were six players;

Steve Rowland (Chorley) Carthaginian

1510

Dan Johnson (Lancaster) Arab Conquest

1050

John Holroyd (Bolton) Sassanid Persian

775

Justin Taylor – me - (Preston) Classical Indian

765

Dave (Preston) Late Roman

630

Lee Yates (Chorley) Parthian

215

A good win there by Steve but more on that later.

Because of a double booking at Worthy Games, we had to use the small gaming room. That meant that we were limited to one 12 foot by 5 foot table,which I split into three 4 foot gaming tables. I decided to use green carpet tiles (that I had picked up at a discount carpet suppliers in Bolton) as the best surface to play on, despite being heavy to carry.

wma022313_01s

Four foot wide table were a bit cramped and gave the feeling of attacking down the floor of a mountain pass, rather than the open combats I had been hoping for. The limited frontage favoured infantry armies as it was difficult for cavalry armies to get round the enemy flanks.

But we still had some very nicely painted armies turn up. These are Dans Arab Conquest army

wma022313_02s

And Steves Carthaginians

wma022313_03s

Lees Parthians advancing in the early part of the game.

wma022313_04s

And my own Indian army advancing against Daves Late Roman army. Dave actually uses his own Indian army and so I experimented with a brigade structure that I had always thought would work well for Indians; two units of bows, backed by two units of spearmen, with single elephants in the middle and ends of the brigades. The elephants make the flanks of the brigade harder to attack and so funnel the enemy into fighting the archers and spearmen. Whilst this brigade formation was quite effective, it really lacked the ability to attack anything and with the elephants tied up supporting the infantry, I really felt that the army could have done with some heavy chariots to provide an attacking arm.

wma022313_05s

The game above (my Indians vs Daves Late Romans) was the most brutal game I played all day. Although my infantry were only really good at defending, my Indian cavalry were unleashed onto Daves archers and managed to obliterate them before attacking the flank of the legions. However the legions quickly smashed my cavalry and then went on to tear the Indian infantry to pieces. Not quite enough to win Dave the game (a win is getting the enemy army to Breakpoint or killing the enemy general) but give him another move and he would have got there.

In the first round of games Dan’s Arab Conquest army shattered Lee’s Parthians giving Dan the only really good win of the round. John’s Sassanids got a slight win against Dave’s Late Romans and my Indians beat Steve’s Carthaginians.

In the second round most of us managed to score zero points, the only exceptions being John’s Sassanids beating Lee’s Parthians and Steve beating the Late Romans.

So we went into the third round with Dan just in the lead closely followed by John but in a upset to the expected outcome, Steves Carthaginians got the only true win of the day (breaking the enemy army) against Lee’s Parthians and stormed ahead. Dan and John fought it out on the top table with Dan just scoring a few hundred points more than John to make Dan a close second behind Steve.

Lessons learned.

Well basically Dan showed us that we have been playing WMA very wrong but the lessons have been taken on board and we hope to up the game locally. I really doubt that we will get anymore interest from the local gamers in Preston but we can continue to play happilly amongst ourselves.

I think the varibale army size system was OK but next time rather than betting against the other players army bonus, I would just make it 3 cards over 3 games and each time you use a card is it ‘burned’ and cannot be used again. So the player has the choice of which bonus card to play in each of their three games.

Oh and I did not allow enough time for lunch. If I do it again, I will allow an hour.

Wednesday, 12 December 2012

The Die is Cast in 25mm Byzantines vs Egyptians

tdic121212_01_s

With the release of the Die is Cast rules we thought we could now have a bit of fun, playing in the scale that the rules were designed for 25mm. Taking two 1,000 point armies Nikephorian Byzantine and Fatimid Egyptian. The above picture shows the Byzantines deployed for battle; one unit of cataphracts in wedge, 3 units of extra heavy cavalry, 3 units of heavy cavalry and 3 units of foot archers.

Both armies were provided by Ian Crosby a long time WRG 6th edition gamer and a newcomer to TDIC.

tdic121212_02_s

Close up on the Byzantine extra heavy cavalry, like all the Byzantine heavy cavalry a mix of half lancers and half archers. Eight figures to a unit, which is probably on the small side for TDIC.

tdic121212_03_s

My hot unit in this army, twelve cataphracts with lances in wedge. Guard and veterans, capable of beating any other unit on the table.

tdic121212_04_s

A unit of Byzantine foot archers and two units of heavy cavalry.

tdic121212_11_s

The Egyptian army. Three units of foot archers, two units of light cavalry, two units of elite Mamluks and four units of Askar heavy cavalry. The Egyptian cavalry units were even smaller than the Byzantines, at only six figures each. This was to prove a serious disadvantage as the game progressed.

tdic121212_12_s

Close up on the Egyptian foot archers with the general behind them.

tdic121212_13_s

At the top of the photo, Egyptian light cavalry supported by Mamluks and Askars.

tdic121212_21_s

The start of the game with Byzantine and Egyptian heavy cavalry clashing. It has gone badly for the Byzantines with the Byzantine unit at the bottom of the picture reduced to only one model. But in the melee the Egyptians have been reduced to half strength preventing them from further advance.

tdic121212_22_s

The blue Byzantine heavy cavalry are poised to launch a flank attack on the Egyptian cavalry ripping their friends to pieces.

tdic121212_23_s

In the centre the already damaged unit of cataphracts, charge but misjudge the distance, exposing them the fire of all the Egyptian archers. It was enough to reduce them to half strength and stop their advance.

tdic121212_24_s

On the left quite an even fight. On the far left lancers are fighting the light cavalry whilst the other combats match Byzantine cavalry against Egyptian lancers.

tdic121212_25_s


tdic121212_26_s


tdic121212_27_s


 tdic121212_29_s

But it was a loss. Two units of Byzantine cavalry were defeated leaving only one unit led by the Byzantine general to fight on. On the far right one of the retreating units was charged by a fresh unit of Egyptian cavalry resulting in almost certain defeat.

tdic121212_30_s

In the centre, the remains of the cataphracts gradually fall back taking casualties as they do so from the enemy archers. The Byzantine own shooting is mostly ineffective.

In the next turn, the blue Byzantine cavalry charge the red Egyptian archers. The archers failed their morale test and retreated. The charging lancers were shot to death and the last remaining hope for the Byzantines for victory was gone.

tdic121212_31_s

The Egyptian light cavalry on the right advances.

tdic121212_32_s

And the combat in the centre continues.

tdic121212_33_s

On the left the Egyptian cavalry are fighting the retreating Byzantines, break them and force them to flee.