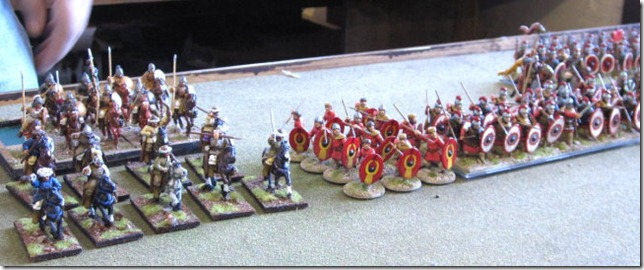
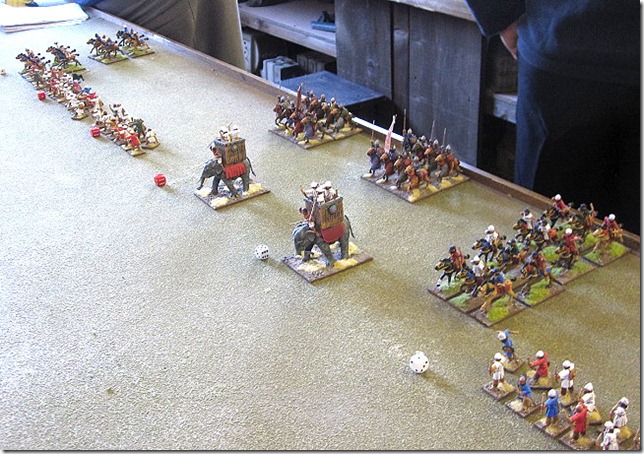
We were using the lists in the new Armies of Antiquity book, 2800 points each.
My army was:
General (mounted)
a unit of 3 chariots
2 units each of 8 noble cavalry
4 units each of 24 Fanatic infantry
3 units each of 18 Fanatic infantry
with the following Greek allies
a unit of 18 peltasts
unit of 11 javelinmen
2 units of archers 10 and 14 strong respectively
The Galatian army is mainly made of fanatic infantry who are classified as Frenzied. That means that each figure fighting gets 2 attacks each and because of their mixed weapons, get to re-roll misses in the first round of every combat. A fearsome lot indeed. The other benefit of being Frenzied is that they ignore all Panic checks and are immune to Fear or Terror. That means that I will have an army that I can rely on not to break and run if their friends break or they are shot at. The only disadvantage is that I am forced to charge enemy if they get within my charge reach, which a cunning opponent will try to do.
The players and their armies
My first game against Andrew Beer using Dacians. These Dacians have bows as well as Mixed weapons giving them a fearsome firepower
And my Galatian army
My units as they advance toward the enemy. My losses are extreme the unit on the right has lost 2 full ranks and the unit to the front has lost only slightly less, one rank. So I pull back the unit on the right and try a desperate charge with the unit at the front, it fails and the Dacians break them and start pursuing me.
This picture is linked to a bigger version of the picture, so just click on it if you would like to see the larger version.
The view of the right of the table, My chariots and infantry advancing against Dacian cavalry, the Dacians charge and beat my cavalry, pursuing into the infantry.
In the centre I am counter-attacking whilst the victorious Dacian unit moves forward. My broken unit has rallied in the rear but has been severely damaged.
Click on above for larger image
My charging troops won and swept the enemy away. Because of the losses I suffered, it was a decent 23 (to me) - 9 (to him) defeat.
Second game against Tony Garrys Romans, it was fast, I didn't take any pictures and I lost completely 0-32. The Romans just charged me, won all the combats, destroyed my army and I did not cause a point of damage to them. Lesson learned, the Romans can beat me easily if they charge me (other way around is a different story).
Third game against Andrew Kershaws Seleucids. Hard army for me to beat with elephants, pikes and very good cavalry.
Click on above for larger image
I managed to sneak some javelinmen through the woods and throw javelins into the side of an elephant, causing it to stampede. OK one down, another to go.
On my right the peltasts charge my chariots, who beat them, pursue close enough to the elephant to take a Terror test, which they fail and run straight off the table edge. Just one of those days.
On the left I manage to break 2 units of cavalry and start to advance
but the enemy rallies both units of cavalry and counter-attacks, it is a savage fight and could have gone either way. Losses mounting on both sides but I had the numbers to take it. On the last turn of the game I break the enemy and get a slight win 19-13. One lesson I learned from this is that I cannot break a pike block frontally, they strike first and kill so many of my figures that I have no chance to win. And because I have to charge if I can, the trick is to be no where near them in the first place.
So 3 games on the fist day, onto the next day for 2 more.
First up against John Walls Imperial Romans. OK know the drill for this one, get the charges in and win! Sorry I didn't have time to take pictures of this one. It was a hard fought game and John had done well in earlier rounds and I got a 25-7 victory.
Fifth and last game against Bob Stradlings Romans - more Romans well at least I knew what to expect. Bob totally fooled me for deployment as with a hill to deploy his artillery, I thought he would put the artillery there and deploy the rest of the army below the hill using his artillery to act as fire support to his attacking legions. OK he put his artillery on the hill but then put his legions on the other flank.
Bob got first turn, moving aggressively toward me with his legions and getting lucky and wiping out my chariots with long range artillery fire on the first turn, this game was going to be no joke.
Click on above for larger image
On the right Bobs Numidian cavalry first wiped out my skirmishers but were then charged and defeated by my peltasts (rolling the best dice I had all weekend)
My units on the right then swept forward, taking out the Roman skirmishers, almost wiping out the Numidian cavalry and finally charging the Roman auxila from the front and the flank at the same time. I had the option to go for the artillery with one of my units of fanatics but instead turned it left to threaten the Roman centre with a flank attack, so that he was forced to stop advancing toward me and threatening to charge me. So by turning the flank, I had effectively won the game.
Meanwhile I had broken the Roman cavalry on the left, so was swinging round on that flank too. However the Roman general had taken the legions standard and launched a charge in the centre which (as we would expect) broke the infantry in front of it, it then pursued into and broke another of my units. But I had another unit prepared for this and it then charged into the only successful Roman unit on the table, who chose to flee rather than fight it out.
Click on above for larger image
View of the right
an isolated unit of legionaries surrounded by screaming Galatians
click on above for larger image
the end. The Galatian cavalry charge into and wipe out the fleeing Roman general, his army standard and the unit he was with - the Romans fled to this position from the cavalry charge and the cavalry had sufficient charge distance to reach them.
A 30-2 victory for me but my opponent rolled the worst dice I have seen all weekend.
Third place, Ed McDonald with Imperial Romans
Second place, Tony Garry (the guy who trashed me in game 2) with his Romans
And in first place Malcolm Barnfield with Seleucids
And some of the prizes for the event
Andrew Beer is the most sporting player (he was using the Dacians and was a pleasure to play)
![wabgt2012_03[1] wabgt2012_03[1]](https://blogger.googleusercontent.com/img/b/R29vZ2xl/AVvXsEg0wy95MlGfUSEy1CGfizES6opX1sPHz1orSFJlON-3wG0gZnToiN3Q8CgKx9bsRalPe-OlX0GKefEPbBQSGnKNudrtS8bjVnT6-rrPW4PCQvn0gPU7kh0ngR8XI4GEvbquWMmKCLWtqwY/?imgmax=800)
Keith Tait gets the prize for the best painted army
![wabgt2012_04[1] wabgt2012_04[1]](https://blogger.googleusercontent.com/img/b/R29vZ2xl/AVvXsEja-EVIfCbyfuXMnOjfNor_WywDM6glxcsCS5bmceZChdBegqp-12v7QAJWhzMpdf5hqbBxlItydkd76-D87J8it0gsRP8Znorr-GomFOuBLMhrLxaPdqTZZKOmB84yGuWCox1ySuqtZKM/?imgmax=800)
Now some of the armies that I did not get to play, in photos
Mike Whitakers Ancient British
![wabgt2012_60[1] wabgt2012_60[1]](https://blogger.googleusercontent.com/img/b/R29vZ2xl/AVvXsEiCAcqlJw0XRxLjTyjbJFVvwjHrvNbOku41FWEXVnVRJEFA2WvXO-flcIl2xVfvzqPEp-fnz5byTOM_6dCTjbofevVUzCtrUHJJadH9JOf_fDZWSn-rpx_8R9h66X3Lk74IqFyqUkyO38A/?imgmax=800)
Martin Gibbins Late Romans – all these picures below are linked to larger versions of the picure. Just click on the pic for the larger version.


Phil Vernons Seleucids


Now I am not sure but I think these are Keith Taits Sassanids

Overall I scored 113 points (23 in first game, 0 in 2nd, 19 in 3rd, 27 in 4th and 30 in 5th game). I calculate that as 99 points scored out of a possible total of 160 and somewhere I picked up another 14 points but the event organiser will know where those came from. And all that was good enough to get me 5th place.
The winner was Malcolm Barnfield Seleucid with 156 points and that is a really stunning total.
It was my first chance to use an army from the new Armies of Antiquity lists and from chatting to the other players it seems that all the armies were balanced to play. I think the Germans and British were always going to struggle, both fairly weak warband armies with little armour. But there seems no need for the ABC balancing system which was in use with earlier supplements. A lot of the special army rules have gone but if you wanted to bring those back, simply use one of the earlier specific WAB supplements and both players choose from that, no problem. But for tournaments (and remember a tournament is just a place for people to come and play people they don’t normally play, not a place to prove how ‘good’ you are) allowing a wider range of armies to play against each other fairly allows more people with different armies to come.
Plans for next years 2013 event are already in progress and you can see what is happening here:


![020212_01[1] 020212_01[1]](https://blogger.googleusercontent.com/img/b/R29vZ2xl/AVvXsEjxnkeovQv8OFrjMuUg9RNasr2rU0v7xdHzw3df-8b6f5vz7wvaESByef0CDpb__gcthesAmmx9GA_4YC01oyUs1Dfj2S6bLXTlTCGunCtCeRAUDYrPdqJlxqCvyAyQI1RyxF4C9oJXZOM/?imgmax=800)
![020212_02[1] 020212_02[1]](https://blogger.googleusercontent.com/img/b/R29vZ2xl/AVvXsEgzV69CDaXqZ_ZEL4MtOdE40y5agRVHJATkK8HcEZIk_ADigdR2Q9bQI6zcQjE-9XNQ__umERpATKxUMm_JyaVpVUOhsclGOVpXaCzH_kcehMB2vWSsVs_jdreH8Om9vh7dRNqxxAeb_lc/?imgmax=800)
![020212_03[1] 020212_03[1]](https://blogger.googleusercontent.com/img/b/R29vZ2xl/AVvXsEi5pNBsXsg2q9p_sF8B5LQZ77vkLemhTbbJ4xot53llvHgkyjWbLCR1KapOsqGpoHF_G6sJaA7Ne6N8L-SJxeDa6FaWcvlhzhlzbd4YA7wrO-Gj79r7KpVMGKaC7uJMA4iK4hFnFhSQGDI/?imgmax=800)
![020212_04[1] 020212_04[1]](https://blogger.googleusercontent.com/img/b/R29vZ2xl/AVvXsEgSQnd-W1nQ6ch-2m1j-3ZRHQx_Kg18WsYzuFt6GxCIrCYQ0bHPHklfU5ra_KjyvhhJEQ67bc3kgrmFkKbk_LX8z8qXi6bz3Q0w-ko6D3eTCt1KWVkwCaCDasnjs1CgiSPAU4a_IHoJMSI/?imgmax=800)
![020212_05[1] 020212_05[1]](https://blogger.googleusercontent.com/img/b/R29vZ2xl/AVvXsEhdKSHiFhlb_78vsxnWRC9vKiQmFNzrzSGK151wsIdcvVu-VbSlKUTanRzZqhaeELQnWkszCqx5NTmbI0pSMum5FXJPRCyQJ0y4Fb3w3AsB3iy0HiRQo1-P6kl-2vaBVVyku48EwVtid_M/?imgmax=800) .
.![020212_06[1] 020212_06[1]](https://blogger.googleusercontent.com/img/b/R29vZ2xl/AVvXsEhBV7FkEmSJuJ9FoezNu6xrpjE8lnye8jIoiuzn4Bv5ro7sH4XJdD165zfw0_zscoA3Mqk5BhEcQBs9Yev3u_ESjprD9WzfKJtrvv1oMNaDnjHjexJKZh9Iegq4kRaPr1MnStF3BbI9SH8/?imgmax=800)
![020212_07[1] 020212_07[1]](https://blogger.googleusercontent.com/img/b/R29vZ2xl/AVvXsEgreR_1rcGLt-9tw-3G4chnfQedZ_3dbCPeBwHrkIU5fiv9QHvgx1cdY_O7IzknKvqcMlBEQKDPFwZXZbMfM_K2Yjkbhx_ghDzumJkbA_xi8JkBBZ5vUdUWCYBSRniC7fg7IM-9DsbNnkc/?imgmax=800)
![020212_08[1] 020212_08[1]](https://blogger.googleusercontent.com/img/b/R29vZ2xl/AVvXsEhrl7Y7m9phtSm1lGw7Pq5-bHu15vUaPUjJdeJ61NRFeCknh_YpXQ6Js6KqHxMn6YQzz4XEcC2LVHLB6cKGiMv3QlFg0TKBPy-U2h2DR6ANjV7eD5RVdnWuaJm3bO3XotjknRto9T_cqYw/?imgmax=800)
![020212_09[1] 020212_09[1]](https://blogger.googleusercontent.com/img/b/R29vZ2xl/AVvXsEink5dlkfXnAk79JZ0XNm0KLI8O97EQlFCrxkxP_LSOnr2uzcLmWryQM9zFNMUhZhdmlo4pOAH2Y3r-Rba1e3HqX4ZeBMM43xpgGVG0dTQTTMKYsWVwzRVG0y-AEBs-Dnns6dQCf5Cx2js/?imgmax=800)
![020212_10[1] 020212_10[1]](https://blogger.googleusercontent.com/img/b/R29vZ2xl/AVvXsEiHG0qjniXT1wNT1RhsoaYLHw1QZpyRbNn9yERAWmpdOVwl8MA9pxgdv91Os6hLbtWffUEZk6o5HoQmHbThQFhnGIb4ccNwQ4DQQr87iDW40owm_GM908DgZ7DXCYwgL72YRI1RaHYLVOY/?imgmax=800)
![020212_11[1] 020212_11[1]](https://blogger.googleusercontent.com/img/b/R29vZ2xl/AVvXsEiH5LVagQBUCcojrA4pyEAEvwNHmtRVPZLgK_rzYfVcrobLX-_1-rhfkCOcPvXgB2TMOOoaFuClkhs8oPAaDzTi69Qv_lf1Q-EQCKewGJEaVD3hyphenhyphenVs_DRxpNoikzuoOKsD94Z9_Qi6mXbQ/?imgmax=800)