Popular Posts

Monday, 19 December 2011

Warhammer Ancients Celts vs Republican Romans

About 2 years ago I used the Wargames Factory Celts to build an army for a local tournament called Toy Soldier.
We were using Warhammer Ancient Battles rules (WAB) and the lists allowed me either to take cavalry or chariots but not both. I chose the option of an earlier army with the chariots. So my army looked like this
General and army standard bearer
3 large units of Gallic infantry (warband) and 2 smaller ones
2 units of chariots
3 units of skirmishers, 2 with javelins/shield another with slings.
I like to mix up the size of Gallic units as different sizes are useful for different things. A large unit is useful to charge into combat with as the extra size takes a lot of punishment and can just overwhelm the enemy. On the other hand a large unit is over-kill if you just want to clear away some skirmishers or are hitting an enemy flank.
My opponent (Phil Stirpe, the cheerful chap in the striped shirt) was using Republican Romans a rather tough army using the triple line formation which allowed him to replace tired units with fresh troops from behind. It is a sad thing that most wargames rules only allow the Republicans to perform this manoeuvre when it continued to be used by Imperial Romans as well but that is a side-track into history. Phil was fortunate to get 2 woods on his side of the table to secure his exposed flanks and thus place his army in the best position to beat mine.
My plan however was simple, to go straight down the middle and out-fight his army. Whilst not being subtle I have found the simple plans work best for barbarian troops. Just in case my simple plan did not work, I also tried to go around both of his flanks.
The situation on the table after my first move

a unit of chariots and a small unit of infantry on the left, 2 big units of infantry in the middle and large and small units of infantry on the right supported by skirmishers. One of my units of infantry has charged the Roman skirmishers and is about to wipe them out.
Close-up on the centre, with the chariots about to fight the skirmishers. You can see the tightly packed Roman army here in a 3 line infantry formation.

the skirmishers stood no chance and were easily beaten. The units of skirmishers either side failed leadership tests and also broke, clearing the way for the chariots to pursue into the Roman heavy infantry. It was a suicidal action but would inflict a bit of damage on the Romans and also prevent the Roman infantry from re-positioning his forces. So I did it.
At this point both my units of chariots have been destroyed, the Roman cavalry counter-attacking on my left very effectively. My only comfort was that the Roman cavlary took so many casualties that they were a spent force, even one round of javelins should finish them off - if I could catch them. But in the centre my infantry had charged home, it was all coming down to my superior numbers. On my right I had no Romans to fight so had swung the forces on the right to help out in the centre.

And the crunch comes. My forces from the right have swept round behind the Romans cutting off their retreat  and although I have lost one of my big units of infantry, half of the Roman army was at this point routing  - I have to say though awful leadership rolls by my opponent.
A hard fought game on both sides and one where both players used their armies strengths to overcome he enemy. Mine vast numbers and his the line replacement system which allowed him to take damaged units out of the line before they broke.

Sunday, 13 November 2011

A British army for Black Powder Zulu wars games

Starting with the  British I am now getting the armies painted for Black Powder.
The British (3 units of infantry, 2 units of cavalry, 2 guns and 2 officers) are now painted (guns need a bit more work) and with basic bases. I intend to add rocks and grass to the bases but that is for when I have a bit more time. Figures have been painted in 'heroic' fashion so white helmets instead of dyed. Infantry mainly Wargames Factory. With cavalry, officers, guns and kneeling infantry Empress Miniatures.
The army
zulu_britisharmy_s[1]
The infantry
[zulu_british_01_s[1]
zulu_british_02_s[1]
zulu_british_05_s[1] 

I think you get the drift of the rest
zulu_british_06_s[1]
zulu_british_07_s[1]
zulu_british_08_s[1]
zulu_british_09_s[1]
And if you want to go large you can follow these links
http://www.3vwargames.com/whammer/zuluwar/zulu_britisharmy.jpg
http://www.3vwargames.com/whammer/zuluwar/zulu_british_01.jpg
http://www.3vwargames.com/whammer/zuluwar/zulu_british_02.jpg
http://www.3vwargames.com/whammer/zuluwar/zulu_british_03.jpg
http://www.3vwargames.com/whammer/zuluwar/zulu_british_04.jpg
http://www.3vwargames.com/whammer/zuluwar/zulu_british_05.jpg
http://www.3vwargames.com/whammer/zuluwar/zulu_british_06.jpg
http://www.3vwargames.com/whammer/zuluwar/zulu_british_07.jpg
http://www.3vwargames.com/whammer/zuluwar/zulu_british_08.jpg
http://www.3vwargames.com/whammer/zuluwar/zulu_british_09.jpg

Friday, 11 November 2011

Redesign of 25mm Spartan and mixed hoplite designs transfer sheets.

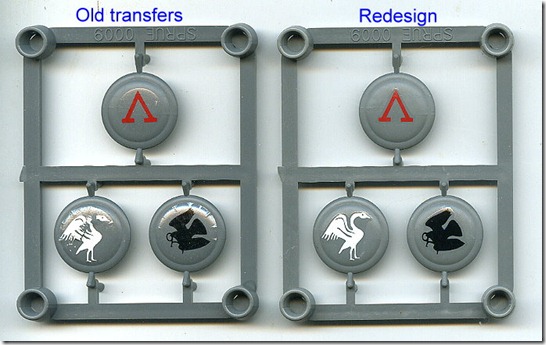
Whilst trying out some of the 25mm Greek shield patterns on the new Wargames Factory plastic hoplites, I noticed that the edges of the transfers were creasing. That was because the carrier film (varnish) could not fit the slightly domed curve of the shields. Now the transfers for the Spartan V (GG5) and mixed hoplite designs (GG8) have been redesigned to only have the
minimum amount of varnish needed. As I hope you can see from the attached picture the transfers fit the shields much better (on the right) and will improve application on all Greek shields, from whatever manufacturer.
transfer_redesign111111
You can clearly see the wrinkles on the old designs (left of picture) but there are none on the new version of the designs.

Sunday, 9 October 2011

Visit to Stafford Games Midlands gaming centre

Tim Haslam set up an introduction to the Clash of Empires ancients rules, on Saturday 8th October 2011 at the new Midlands gaming centre. Several players from around Manchester went down and here are my photos.
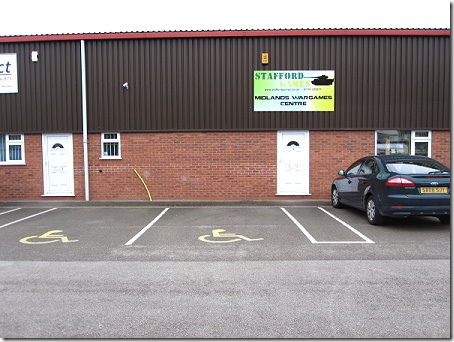
The outside of the gaming centre, on a new industrial estate, so it is wise to have the phone number of the centre in case your satnav cannot get you to right place. Plenty of car parking.
mids100811_01
mids100811_02
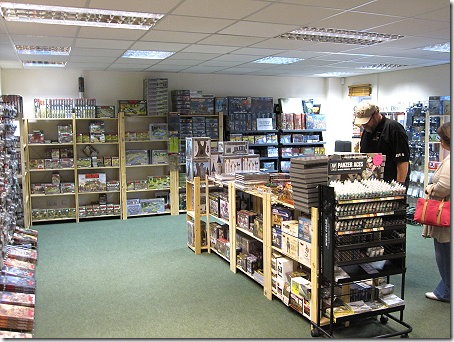
Inside, a wide range of gaming products, rules, magazines, paints, tools, scenery…..
mids100811_03
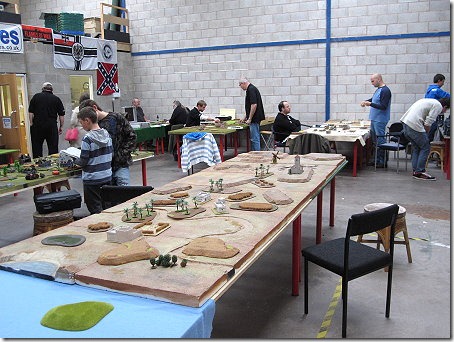
The gaming area with 17 six foot by four foot tables
mids100811_04

Then some photos of the games of Clash of Empires we were trying out. In this series of photos I followed a battle between Romans and a Macedonian Successor army.
mids100811_11
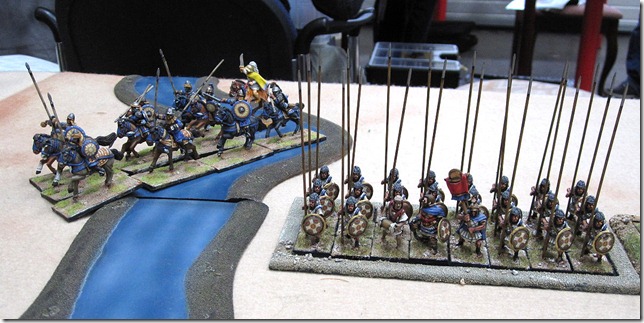
The Successor force, mainly pikes but with some good cavalry and elephants
mids100811_12
The Romans, bunched up to take advantage of their superior fighting skills. The idea being to deny the Successor advantage in numbers.
mids100811_13
Now these are some more detailed photos, click on the links underneath the photos if you want to see the full sized pictures.
mids100811_14
http://www.3vwargames.com/events/staffordgames2011/mids100811_14.jpg
mids100811_15
http://www.3vwargames.com/events/staffordgames2011/mids100811_15.jpg
Now the action of the game. On the Roman right, some Successor Persian cavalry came round and charged a unit of Gallic cavalry, hoping to expose the Roman rear to attack.
mids100811_16
The Gallic cavalry counter-charged, so that they would have the bonuses for charging as well. The combat did not go well for the Persians as they failed to score a single hit on the Gallic cavalry. But the Gallic cavalry scored two kills on the Persians.
mids100811_17
The Gallic cavalry combat result was boosted by the presence of the Roman commander and combined with a poor (high) die roll for the effects of combat, the Persian cavalry unit was destroyed and simply removed. The Gallic cavalry then had to pursue (as warband they must do this) and in turn were charged and wiped out by the Successor cavalry in the top right of the above picture. Note: in Clash of Empires wedge formation is represented by a column 3 wide, in which the first 3 ranks fight.
You can see that to be safe the Roman player formed a unit of legionaries round behind the Gallic cavalry, just in case the Gauls lost. When the Gallic cavalry were wiped out, this unit was then protecting his flank. Romans are disciplined troops and able to manoeuvre extremely well under Clash of Empire.
But now the main lines of the armies are ready to clash. The Successors have yet another unit of cavalry going round the Roman flank on the far side of the picture but the river has really hindered its movement.
mids100811_18
The Successor commander decided that given all the advantages of the Roman legionaries, it would be safer to charge that end Roman unit with two elephants and see what happened – this is a learning experience after all.
mids100811_19
The Roman unit is hit (it failed to do any damage with their pila as the elephants charge in), take 4 casualties and do none in return. The combat result is flee for the Romans and they are caught and run down by one of the pursuing elephants (the elephant rolled a higher pursuit move than the Roman flee move). That Roman unit is simply removed and as a result of a failed morale test the rearmost Roman legionary unit also flees.
mids100811_20 
So this is the situation at the point I left to travel back home
mids100811_21
The Romans have lost one unit of legionaries, another fleeing, one unit of cavalry (the only one they had) compared to the Successor loss of a cavalry unit. There is a fairly big hole in the Roman line and 2 elephants ready to charge anything that enters it. The next move is a  Roman one  but it does look as if they are going down to defeat.

Wednesday, 5 October 2011

New Wargames Factory Greek hoplites

I have just received the new plastic Wargames Factory hoplites and taken some scans of the sprues.
First of all the heads, there are 3 different types on a sprue and there were 10 sprues in the box.
wf_greek_hoplite_heads[1]
Bodies, one of the bodies has the bronze muscled corselet 12 in the box and another 18 in the linen linothorax armour. All have greaves, so these are for the heavy armoured hoplite figures.
wf_greek_hoplite_bodies[1]
Arms, 5 sets of these and 7 pairs of arms per sprue, so enough for 35 figures.
wf_greek_hoplite_arms[1]
Weapons, 10 sprues of spears and swords. The sword (kopis) is supplied drawn, for gluing into the hand and sheathed to be mounted on the body. My preference is for the hoplite to be armed with a spear and for the sword to be sheathed. Fantastic looking spears.
wf_greek_hoplite_weapons[1]
Shields, 10 sprues of 3, just enough for the 30 figures in a box. The shield is a total of 16mm in diameter, with the central area very slightly curved (easy to stick transfers to) and 13mm in diameter.
wf_greek_hoplite_shields[1]
Included with the figures is a new item for WF, plastic bases. 30 of the 20x20mm bases are included in the box.
wf_greek_hoplite_bases[1]
OK so now the next task is to build some of the figures.

Thursday, 8 September 2011

Warhammer Ancients Axes and Axis 2011

With Warhammer Ancient Battles (WAB) hard to find these days it was nice to see the Phoenix Gaming club running a combined Flames of War and WAB event on Saturday the 20th August. That meant I could go down to Cambridge pick up my mate Steve Riley and head off for a days gaming in Rushden not far away. Steve seems to live in a wargaming desert near Cambridge, so if you know of any gaming going on round there please let me know and I will pass on the details to Steve. As it turned out I ended up being the sponsor for the event, so took down prizes as well as stuff to sell.
I decided to take Carthaginians the first chance to use the new Carthaginian spearmen I had worked on earlier – you should be able to spot them in the photos.
We were using 1500 point armies to give fast games and my army consisted of
General and Army Standard bearer, both mounted
20 trained African spearmen
32 Gallic warriors
22 Oscan hoplites – the cutting edge of the army
14 Oscan warriors – light infantry, to be used as a formed unit or as skirmishers depending on the game
12 Gallic cavalry
1 elephant
9 skirmishers with javelins
The day consisted of 3 battles using a scenario pack, shown here for info. So on to the games
First game, with defenders in the middle trying to cross the table with the attackers closing in from both sides. I was up against Imperial Romans
rushton_01[1]
the brown felt represented an area of difficult ground. My opponents deployment was 2 units of legionaries on the left of the picture with mainly missile troops on the right. The cavalry played no part in the battle and marched off (to gain victory points) as soon as they could.
rushton_02[1]
on the right I deployed my skirmishers, elephant, hoplites and Gallic warband. The idea was to advance quickly to prevent the Romans from marching off the table (to victory). The Gauls were my fast attack force to be supported by the hoplites if serious fighting was involved.
rushton_03[1]
and here you can see the whole table with my cavalry, Oscan warriors and African spearmen ready to roll in from the other side.
The Gallic cavalry hit the Roman artillery from behind and destroyed them, the Gallic infantry took heavy losses from artillery and bow fire as they advanced but charged and over-ran the Roman archers. But I was unable to break the legionaries and the game ended as a draw. Lesson learned from this game, warband cavalry are too unmanoeuvrable, so don’t use them in your army. Cavalry are there to exploit enemy flanks and rear and these guys failed to do it (the rule, warband only move at half speed unless they go directly ahead unless charging).
rushton_10[1]
A look around at some of the other games going on
rushton_04[1]
rushton_05[1]
Paul Scrivens-Smith the eventual WAB winner with another Carthaginian army
rushton_06[1]
my friend Steve (on left) with his Franks, against an all cavalry Scythian army. The Scythians got first turn and simply rode off the table and to victory. Silly scenario!
rushton_07[1]
rushton_08[1]
this chap has obviously decided to stand his ground, form a semi-circle and fight it out.
Second game, a head to head battle up against a late Persian army
rushton_11[1]
close up on my Gallic infantry
rushton_12[1]
against the might of the Persian army
rushton_13[1]
The game was a fairly simple affair, both sides advanced. I cleared the enemy skirmishers out of the way but was then charged by the Persians. It came down to a combat grind with in the end the better armour and fighting skill of the Carthaginians winning the day. A massive victory for me.
Sorry no pictures of the last game – it was too hectic – Paul and I fought in the floor of a valley, the battle swayed backward and forward, I thought I had him but like in the previous game, his troops were better than mine. Both units of Gauls charged in when they should not have (failed the test for warband charging nearest enemy), the elephants crew were all shot dead and it stampeded back into my own army. A dismal defeat was my fate.
But a great day out, well organised by the Phoenix club who are a great bunch of gamers. Paul got first prize for the WAB side of the event and since he did not want to take two prizes I won the goblet of blood for the most troops killed (I think that includes your own!) on the day.

Monday, 5 September 2011

Visibility in WW2 rules

I have tried to come up with a simple yet realistic way to handle visibility in my WW2 rules in development. As players we can of course see the entire table but in battle it is often difficult even work out where the shots being fired at you are coming from.
The system
Two types of target; infantry and infantry support weapons, everything else.
Basic visibility distance; 1000m for infantry/infantry support weapons, 3000m otherwise.
Now this is modified by a series of situations that halve the spotting distance and these situations are cumulative:
Target neither moved or fired last turn
Target in or behind cover (a wood, hedge or building for example)
Target entrenched
Conditions of poor visibility like; heavy rain, snow, mist or night
Observer is a tank within 1000m of enemy – this is the situation when a tank crew ‘button up’, when they come under fire
So as examples; a tank driving across a field in the open could be seen at 3000m, the same tank behind a hedge and whilst snow is falling could be seen at 750m
Once a target has been spotted then it can be ‘seen’ by all the units in the opposing army and continues to be spotted, unless or until line of sight to it is physically blocked (something like a hill or building in the way would do the trick). Of course you cannot actually see through blocking terrain (see hill/building).
Now Recon units role is to detect the enemy, when they are performing a spotting action, they double the visibility distance, so for example could see a tank moving, at 6000m!
Seems a simple system that gives a bonus for being the defender and entrenched.