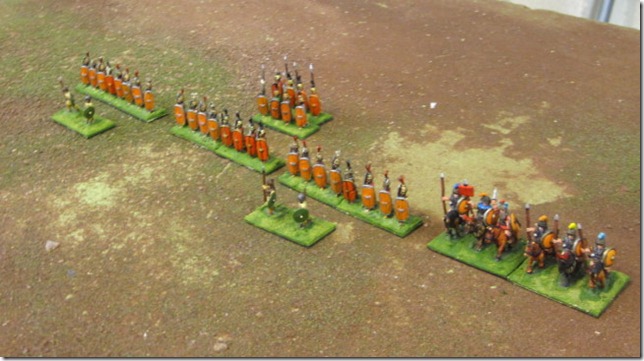
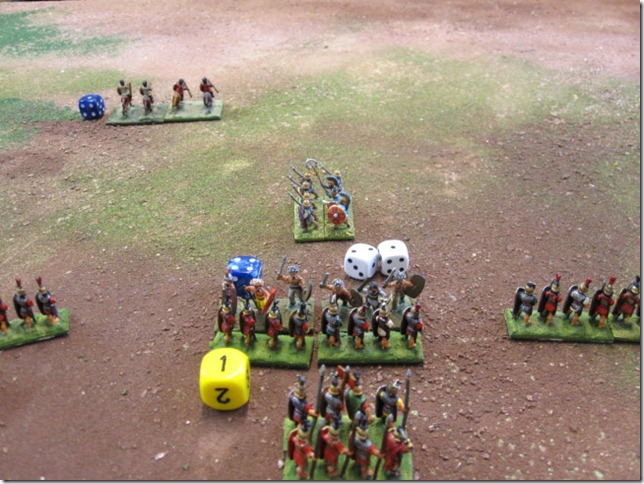
In 2013 the next battle project for the Society of Ancients will be the battle of Chalons AD451, the Hus vs a confederation of allies including the Romans.
So I thought it might be appropriate to throw the new Die is Cast ancient rules into the ring and see how they fare. So lets start with an order of battle.
Using 6mm armies (I have not painted the armies so for this game we just used blank 40x20 bases with the unit ID marked on, no pretty pictures of troops I am afraid). All units are 4 bases except light troops (skirmishers) which have 3 bases to a unit. Light troop bases take 2 wounds, cavalry bases 3 wounds and infantry 4 wounds. For more details on using element based figures in the Die is Cast rules, see page 29 of the rules.
Order of Battle
Rome
1 unit Roman cavalry
HC, guard, elite, javelins, sword, shield
2 units Roman legionaries
MI, steady, veteran, javelins, sword, shield. Sheildwall
1 unit Roman auxila
MI, average, seasoned, javelins, sword, shield, loose
4 units Visigoth cavalry
HC, steady, veteran, javelins, sword, shield
3 units Visigoth infantry
MI, average, seasoned, javelins, sword, shield, shieldwall
2 units Alan cavalry
LC, raw, seasoned, bow
2 units Frank infantry
MI, steady, seasoned, pila, sword, shield
1 unit Frank cavalry
HC, steady, seasoned, javelins, sword, shield
1 unit Allied cavalry
LC, average seasoned, bow, sword, shield
Roughly, 1600 points
Huns
1 unit noble Hun cavalry
HC, steady, veteran, lance, bow, sword, shield
8 units Hun light cavalry
LC, steady, seasoned, bow, sword, shield
6 units Ostrogothic cavalry
MC, raw, seasoned, javelins, sword, shield
1 unit Ostrogothic infantry
LI, raw, seasoned, bow, shield
2 units German infantry
MI, raw, seasoned, javelins, sword, shield, shieldwall
1 unit Frank infantry
MI, average, seasoned, pila, sword, shield
3 units Gepid cavalry
HC, raw, seasoned, lance, sword, shield
2 units German infantry
MI, raw, seasoned, javelins, sword, shield, shieldwall
Roughly, 2300 points
Initial setup
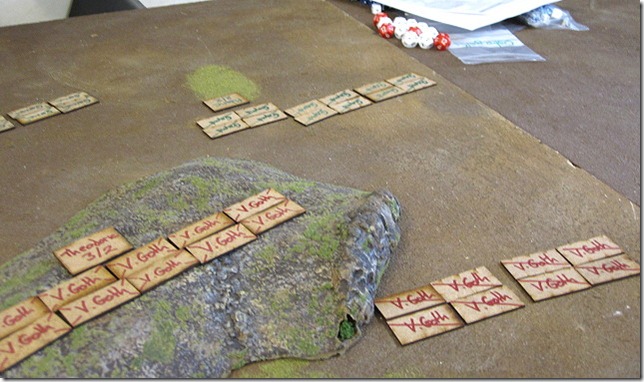
A fairly bare battlefield with a dominant hill on the right of the Roman line. Table 6x4 foot at Portcullis games, Bolton.
In the picture above the Romans (red marker pen) are nearest us and the Hunnic forces on the far side of the table. Special rules for the game:
Romans were passive so they cannot start moving until an enemy unit comes within their charge reach.
Huns tried to take the hill first so the Hunnic player can only move 1 division of their army until they have contacted a enemy unit on the hill. In this case the Hunnic player decided to use the Gepids to take the hill, in the actual battle the Ostrogoths were given the task (and they failed).
The Hunnic cavalry certainly fought hand to hand and there has been some debate about how to represent them. In this game we are simply going to suspend the normal rule that light troops cannot charge other troops frontally and make the Hun cavalry rather good, with high morale and combat weapons as well as their bows.
Once the Romans have broken an enemy unit, then the entire Roman army can start to move freely.
Move 2. Showing the hill lined with Visigoth infantry in shieldwall and their leader (Thedoric a 3/2 general).
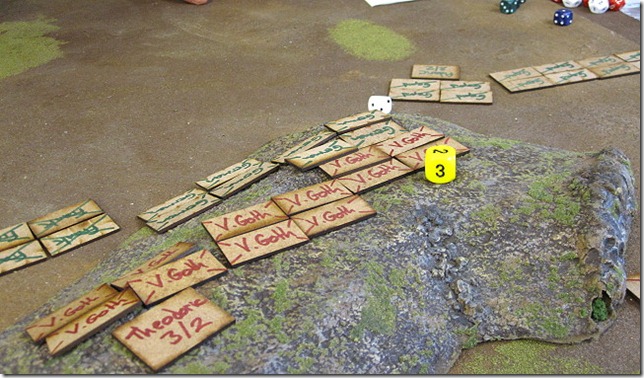
Move 3. Gepid cavalry moving round the hill toward the Visigoth cavalry, who are there to prevent the enemy getting round the infantry flank.
Move 5. On the hill one of the Hunnic units of German infantry attempted to charge but instead became Shaken and so the Visigoths decided to take advantage and launch their own attack, downhill. The combat went to the Visigoths (Roman) and the Germans were forced to Retreat.
Move 5. Overall view, with the Hunnic forces in contact with the defenders on the hill, the rest of the Hun army is free to move.
Start of move 6. The Germans have retreated, followed up by the Visigoths but that exposes the Visigoth rear to a charge by the Gepid cavalry. In an attempt to put the Gepids under pressure the Visigoth cavalry now declares charges on the right.
With a miserable pre-charge morale roll of 4, one of the Visigoth cavalry units instead Retreats in the face of the enemy. One of the principles of the Die is Cast is the morale roll, you can do anything you like with your troops so long as they are under your control. Fail a morale roll (as above) and all of a sudden, they are doing what they want to do. Morale rolls are taken; when attempting to charge, receiving a charge, taking casualties from shooting and when losing a round of melee, for example. In other sets of rules a command and control roll is used instead.
The above situation now leaves the Visigothic infantry on the hill to its fate and a lone unit of Visigothic cavalry to fight against two units of charging Gepid cavalry (who with lances have a slight edge in combat anyway).
End of move 6 combat. The Visigoths lose on the hill. The unit on the far right, sandwiched between the German infantry and the Gepid cavalry is literally annihilated and taken off the board (little pile of counters on the end of the hill). In the centre the Visigoths break and flee and on the left the Visigoths are defeated but led by their general are merely forced to retreat. The Hunnic player tried to stop the Frank infantry from pursuing the retreating Visigoths but failed the morale throw and had to make the pursuit move, exposing their flank to the Visigoth cavalry on the far left of the picture.
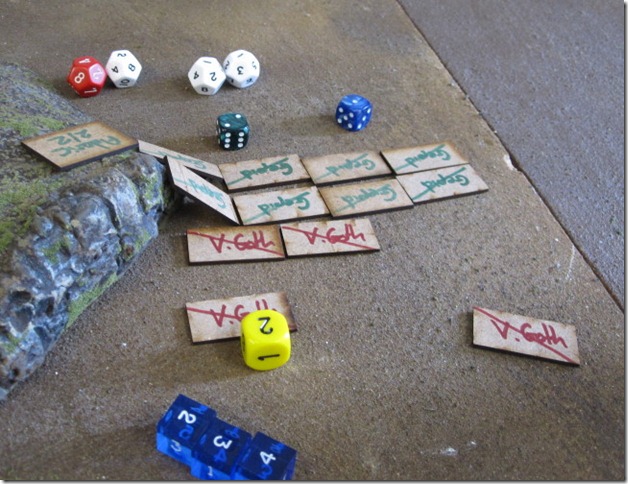
End of turn 7 combat. The Visigoth cavalry have lost a full base and have taken 2 wounds (yellow die) on another base. They are forced to recoil under the pressure of two enemy units attacking them (they will fight with 4 dice against 6 enemy
dice).
Thats all we had time for in this gaming session, in total it took about 1 and a half hours to play through and was a lot of fun for both sides. With a full day to game (perhaps 3-4 hours) two players could fight this through to a conclusion I am sure.
26th of September we tried it again, this time with the Ostrogoths attacking the hill. As per the original game the first action was the Hun player trying to swing round between the hill and the edge of the table. Both cavalry forces (Visigoths and Ostrogoths) threw their javelins, resulting in one unit of Visigoth cavalry Retreating (just as in the first game) and a unit of Ostrogoth cavalry Routing. Continued pressure saw the remaining unit of Visigoth cavalry first Shaken then Routing and the following wave of Ostrogoth cavalry attacking the flank of the Visigoth infantry on the hill and breaking them. So that is the way will play the next run of the game, which should involve some painted figures, Ostrogoths attack the hill, defended by Visigoths. The early part of the scenario works, the next game should see a full run through.
Popular Posts
-
Based on the Veni Vidi Vici rules for 18th century land battle rules, Best Allies, these rules have been modified to better reflect the tact...
-
OK this is a really old game back in 1997 when I used real film to take pictures, not a digital camera. So the pics for this have been scann...
-
Veni Vidi Vici will be presenting the Hunt the Tiger participation game, at Britcon 2016, UMIST, Manchester, M1 3NL on 13th and 14th August ...
Thursday, 13 September 2012
Saturday, 1 September 2012
Die is Cast Carthaginians vs Republican Romans
Another of our small scale games using DBA lists and the Die is Cast rules. The game was played with 15mm figures, mostly Donnington Miniatures.
The Carthaginian army; 2 bases of Spanish cavalry, 2 of Numidian cavalry, an elephant, a base of slingers, 2 bases of Gallic warband, 2 bases of spearmen and 2 bases of peltasts.
The Republican Roman army (under my command); 3 units each of 2 bases of hastati/princepes, 2 bases of spearmen and 2 of cavalry. I decided to use the 2 bases of velites as separate units to both give me extra flexibility and because I believed that under the rules once these light units had taken any casualties they would fairly much be useless, so best give my opponent two units to target.
After the first move. All the Carthaginian cavalry move over to the left to face the single unit of Roman cavalry, whilst I push my Roman infantry forward as fast as they will go.
View from behind the Roman front line.
The Roman infantry press forward but the Roman cavalry turns back and moves away from the Carthaginians hoping to delay combat but still remain as a threat to stop the Carthaginian cavalry and elephant from attacking the Roman infantry in the flank. The Numidian cavalry and a unit of velites hurl javelins at one another. With only 1 die per base firing (as they are light troops), all dice hit, the velites are destroyed and the Numidians take a hit. The Numidians fail their morale test and rout, rallying at the end of the turn.
On the left, the Carthaginian (Spanish) cavalry charge, supported by the elephant. Rather than face that lot, the Roman cavalry try to evade and are caught by the cavalry – they outdistance the elephant. Under many rules that would mean that the Roman cavalry would be automatically broken but is not the case in the Die is Cast. The Roman cavalry will fight back but count as shieldless and unformed. With the charge bonus and fighting shieldless enemy, the Spanish cavalry needed 7’s to hit but only scored one hit (see picture above), the Roman cavalry needed 3’s to hit (no charge bonus and they were fighting unformed and with only one die per base, as they were hit in the rear. The Romans scored no hits and lost the melee by one hit.
However the Romans roll good morale dice (keep the 6, 4 and 2. Discard the 1) and stay in the melee. But they cannot turn to face the enemy and can take no action (unless it is to run away) when the elephant charges in.
On the next turn the elephant duly charges in, the Roman cavalry pass their morale check and fight on. This time the combined attacks of the Spanish cavalry and elephant inflicts 4 hits on the Romans whilst the Romans get really lucky and to do 2 back on the Spanish (rolling 2 dice and needing 3 or less!). So the Romans lost the melee and are now down to half strength, so they roll 3 dice and discard one of those. As can be seen above, they rolled well, kept the 5 and the 4 and Retreated out of the melee. pursued by both the cavalry and elephant.
In the centre at the same time as the cavalry charge is taking place the Roman infantry charge along the front. The Carthaginian light infantry and cavalry are driven off and the peltasts totally wiped out (although causing 3 hits on the Roman infantry on the far right of the picture). In the centre the Gallic infantry take 4 hits (the blue die) and lose a base, half the unit strength, roll 3 for morale and rout. The Roman infantry took 1 hit and pursue into the Carthaginian spearmen behind (who have their flank to the Romans).
The routing Gauls can be seen in the background, running away. The Carthaginian spearmen have been hit in the flank with another unit of Romans coming up behind them. On the left the Numidian cavalry have returned and are throwing javelins into the Roman infantry, causing another hit (the yellow dice are hits taken throughout the game).
On the next turn, the Roman infantry charge into the rear of the Carthaginian spearmen and the Roman spearmen replace the previous Roman unit fighting (using the Legion special rule). These combined attacks reduce the Carthaginians to 50% strength and they lose the melee, roll 3 dice (5, 4, 3) and discard the 3. Even with a roll of 9, the Carthaginians flee and are pursued by both Roman units.
To the left of the picture, the Roman infantry have charged and driven off the Numidian cavalry.
The end in the centre, the Romans have broken through. So even though the Roman cavalry has been destroyed, their sacrifice allowed the Roman infantry to get into combat and do what they do best, fight.
Subscribe to:
Posts (Atom)